Essential tips and tricks that will improve your iPhone's battery life (all iOS versions)
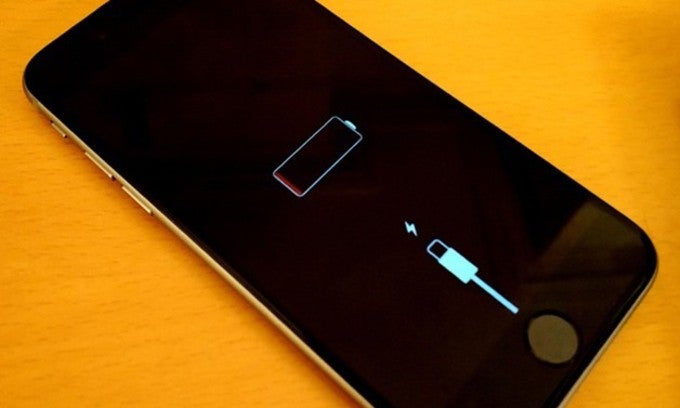
There's no second opinion - Apple's iPhones is a champ when it comes to battery life in standby mode. During active use - not so much, but still, it delivers a coherent user experience due to the fact that one can easily predict how much the battery will last. No, unexpected power loss is something hardly observable in the iOS universe.
Certainly, your iPhone's battery endurance is largely dependent on both the optimization of iOS and the battery at the rear of the device, and while throwing in an extended battery is not possible, improving the battery life of any iOS device is as easy as abc. See, there are some general and more advanced tips and tricks that will noticeably improve your battery life.
As iOS is not quite open, but intuitive, you've most likely came up many of these in your day-to-day endeavors, but anyway, we learn something new each and every day. That said, sit comfortably and check out our tips and tricks.
1. Micro-manage background app refresh
Introduced alongside iOS 7, Background App Refresh is now a cornerstone of the operating system. In case you did not know, iOS allows apps to run in the background for a short time before they enter a suspended state. Background app refresh enables you to define which apps can use your system resources and check for updates while in this suspended state.
Not all iOS apps require access to the background refresh feature — for example, games hardly do, while the feature is all but essential to messaging apps. As you install more and more apps, the total tally of ones that try to refresh in the background and use your resources even when in a suspended state will logically rise up. One thing leads to another, and your battery life slowly deteriorates.
That's why you need to keep a tight rein on the apps that refresh in the background. In case you did not know, you can enable and disable which ones are allowed to do so by heading to Settings > General > Background App Refresh. You can also disable Background App Refresh altogether; Low Power Mode does this by default. We advise you to keep this setting on for apps you rely on (messengers, email clients, etc.) and turn it off for others that are not crucial that crucial for you (Facebook, 9GAG, others).
2. Disable notifications for unimportant apps
Now, you know that by default, each notification you receive will pop up on your lock screen, lighting up the display of your iOS device and prompting you to view it. That's nice and all, but waking up the phone and powering up the screen for each and every notification is a recipe for disaster for your battery life. That's not good, not good at all!
The less apps are allowed to actively show you your notifications, the less time your display is awake, resulting in an improved battery life. Lucky for us all, you are allowed to customize your notifications and select what apps can display notifications on your lock screen and wake up the phone.
In order to do so, head to Settings > Notifications, select a given app and disable the "Show on Lock Screen" option. This will stop your phone from having its display turned on by said app, potentially saving you some battery. Of course, think twice before disabling this for all apps, since you might miss an important notification coming your way. It's good that Apple allows us to modify this setting for some stock apps as well, but we certainly feel that an AMOLED display or a LED notification light would have been a much more elegant solution.
3. Spot and stop battery hoggers
There are certain iOS apps that still find a way to drain your battery despite all the hurdles Apple has been setting up. Recently, it became clear that Facebook's iOS app might have found a new way to keep itself running in the background and draining your precious resources, even with background app refresh disabled. We are not certain what workaround might have been used this time, but previously the app was suspected for employing a "CPU spin" in its code, as well as silent audio session that kept it awake even when suspended.
But how to spot abnormal battery usage? You can easily see what apps have acted as battery hogs by exploring the battery statistics of iOS. Normally, the apps you've used the most should be first in the list, but if you see an app that you don't recall using recently, especially with abnormal background usage stat, then you have a problem. If said app is on the list, then it's responsible for precious amount of wasted battery juice, which is a no-no!
Head to Settings > Battery, and tap on the clock icon in the Battery Usage tab. This will show you how much time each app has been used on the foreground and in the background. If you notice that any of these has an absurdly large background usage, you know what to do - either refer to tip #1, or delete the app altogether to solve your problems!
4. Low Power Mode is your friend
Introduced with iOS 9, this battery-saving feature disables background app refresh, reduces the brightness output by a notch, stops email fetching for the built in app, automatic app updates, and certain visual effects get axed so that you can eke out every drop of juice from your battery. Additionally, the processor gets throttled a bit so that your device uses even less power. Your phone will prompt you to enable it once your battery drops down to 20% and 10%. Once you charge your battery to over 80%, it will automatically turn itself off.
You can manually enable it at any battery level, though, which can potentially prolong the battery life of your device, both in standby mode and during active use. In order to do so, head to Settings > Battery and then flick the toggle. Done.
5. Disable Bluetooth and Wi-Fi when not in use
It goes without saying that the more features you have turned on, the less your phone will last. This applies for all devices out there, not only iOS ones. That's why it's always important to keep your features at bay and only keep the ones that you need enabled. Not that leaving Wi-Fi on will significantly shorten your battery life, but it can potentially save you some juice. The same applies to Bluetooth and AirDrop: leaving these enabled can also shorten your battery life by a little, so it's advisable to disable them when you're not using them.
6. Manage your location settings
Now, we are not saying that you should disable all location services, as you're essentially stripping "smart" out of "phone". However, just like with notifications and background app refresh, these can be micro-managed so as to prevent unnecessary battery drain. See, there are two options for the apps that request location access: they can only use this resource always or only when you're actively using them.
Neither of these is a battery hogging one per se, but if you have many apps that always use your location services, then you might be in for some bad time as these might be negatively affecting your battery life. That's why it's advisable to delve into iOS' menus and choose the conditions when the apps can lock in on your whereabouts. You can manage the location settings by heading to Settings > Privacy > Location Services, then scrolling down the list of apps to see which ones are allowed to access your location while you're using them and which ones can do so at all times. In case you want to change the setting for a certain app, do so by tapping on the app and selecting the corresponding option in the menu that pops up.
7. DON'T force-close apps
Flicking the app card from your app switcher can indirectly shorten your battery life. Why so? Because once you purge them from the app switcher and hence the operational memory of your device, iOS needs to waste additional resources to open them from scratch once you decide to open them up again. Increased resource usage equals increased battery drain, and although this might seem dismal when compared to other battery drainers, it's still worth to have this in mind if you suddenly decide to flick them away from the app switcher.
8. Enable auto-brightness
Never underestimate automatic brightness. It adjusts the screen brightness in relation to the environment lighting and might be a huge battery saver, as it goes without saying that lower brightness output equals lower power usage. We are not sure why someone would want to turn this option off, though we can think of certain scenarios where you might want to manually take care of things. Regardless, leaving this important setting in iOS' hands is a safe bet for better battery life. Make sure to enable it by heading to Settings > General > Display and flicking the corresponding switch.
9. Shorten the auto-lock period
Auto-lock, or the amount of time your phone needs to wait before it goes to sleep, is potentially a huge battery saver. There's no need to leave your phone awake for minutes if you're not using it. Quite the contrary, we advise you to set it to the lowest possible option, which is 30 seconds. This means that after 30 seconds of inactivity, your display will turn off and your phone will lock itself. It would have been even better if Apple gave us more options for this nifty setting, like even lower timeouts, but anyway, 30 seconds is fine. To manage the screen timeout, go to General and look for "Auto-Lock". Open said menu and set it whatever you desire (30 seconds, 30 seconds, 30 SECONDS!)









Things that are NOT allowed: