Now that the Quest 2 has gone down in price significantly (check out the best Quest 2 deals here), because the Quest 3 is just around the corner, you can get the former with more storage – 256GB for pretty cheap!
And the best way to utilize all that storage, besides downloading VR games, would be to transfer all of your favorite shows and movies you may already have on your PC, to your Quest 2. You can also transfer any other file types – PDF files, images, whatever you want!
So, how would you go about transferring videos and other files from your computer to your Quest 2 VR headset? Well, let us guide you through the process…
How to transfer videos and files from your Windows computer to the Quest 2
Step 1: Connect your Quest 2 to your PC with a USB-C cable
Any USB Type-C cable should work, but it's easiest to just use the cable that came with your Quest 2, or a Link Cable, if you own one. Connect one end of the cable to your VR headset, and the other end to your PC.
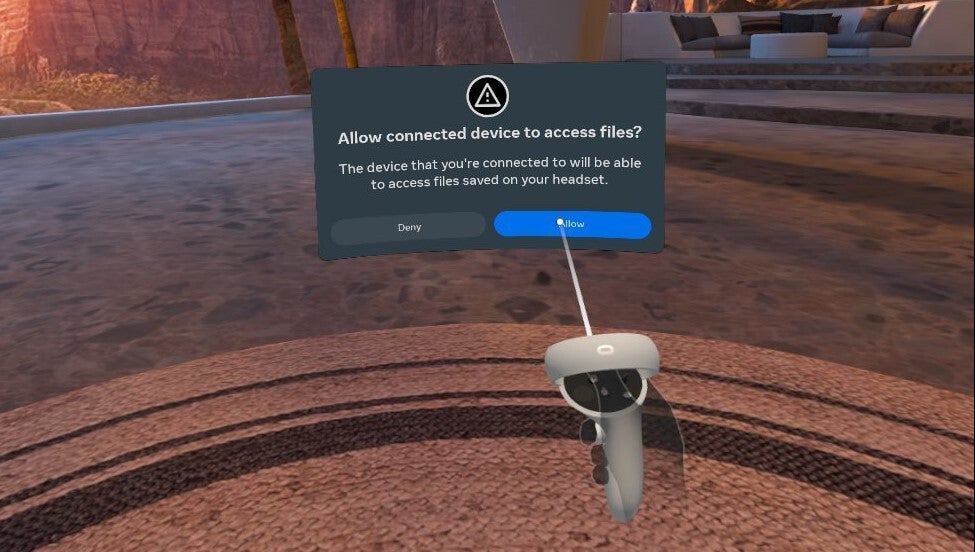
Step 2: Press "Allow" when a prompt appears on your Quest 2
Put on your headset, and you'll notice a prompt asking you to allow your computer to access your Quest 2's files. Press "Allow".
Note that this prompt appears each and every time you connect the two, so you'll have to remember to select "Allow" every time you wish to transfer files between your PC and the Quest 2.
Step 3: Find your Quest 2 on your PC's File Explorer app
On your Windows 10 or 11 PC, press the Start menu and start typing "File Explorer". Open the first app that will appear, which will – unsurprisingly – be File Explorer.
Now, in File Explorer, notice the list on its left side – it shows favorite folders, as well as connected devices – USB hubs, external SSDs, and should show the Quest 2 also.
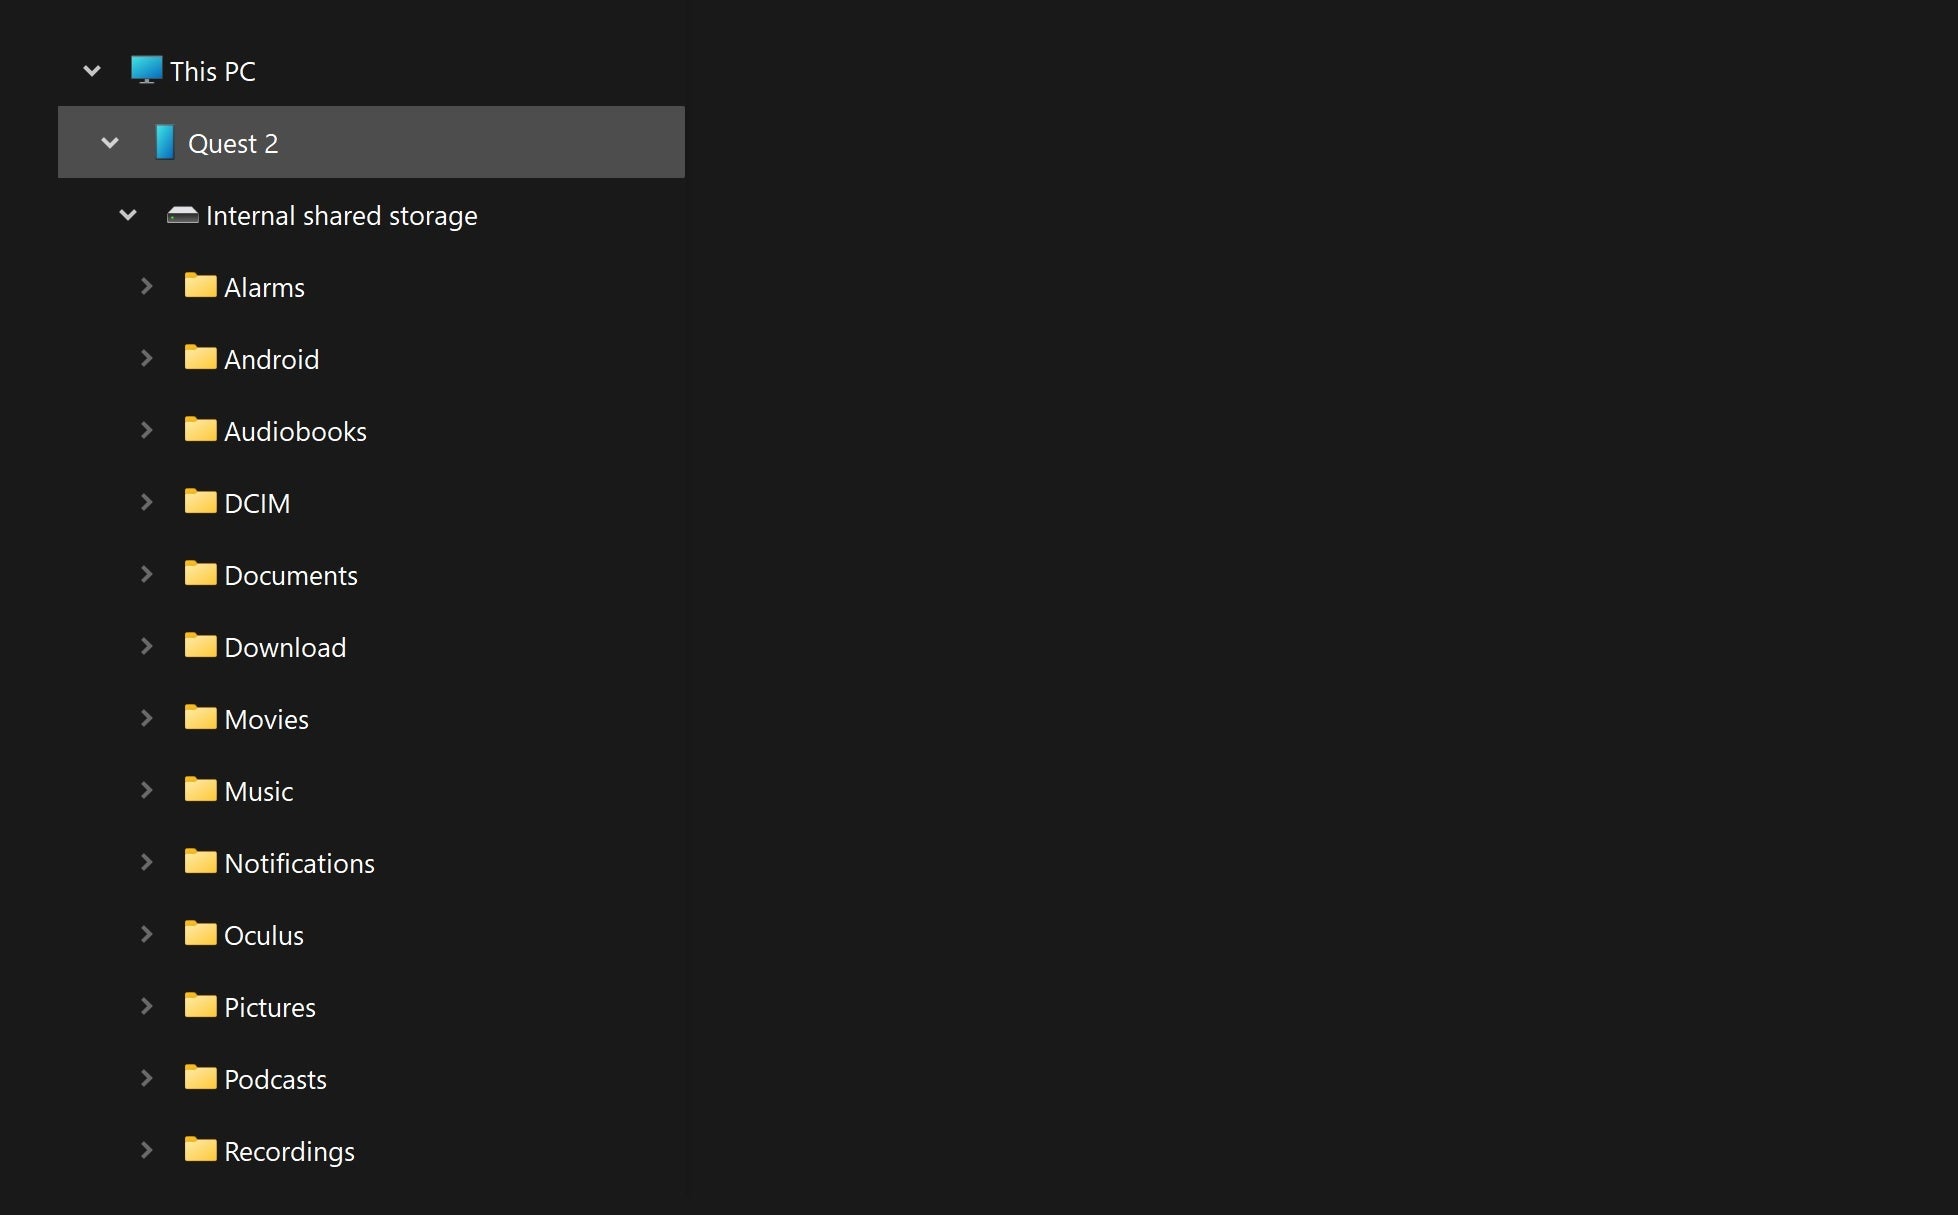
If you don't see the Quest 2 over there, click on the tiny arrow to the left of the "This PC" icon. A list of connected devices should then appear, and one of those should be "Quest 2".
Open Quest 2, then open the only folder inside – Internal Shared Storage.
Here you'll find a bunch of folders that you may have also seen on other Android devices, such as phones and tablets. Those include Music, Movies, and Pictures.
Drag and drop any movies, music files, videos or other documents from your PC, into whichever one of these folders you want, to start transferring them to your Quest 2.
Note that the Quest 2's file transfer speeds aren't exactly blazing fast, so transferring lots of movies in particular will take a while.
Step 4: View your files on your Quest 2 with the appropriate apps
Now that you've transferred your files from your computer to your Quest 2, you can unplug the cable connecting the two, and put on your VR headset.
To view your files, you can use the Quest 2's built in apps, such as the Files app. That one can open the following file types:
.M4V/.MOV/.MP4/.MPG (video files)
.JPG/.PNG (images)
.TXT (text documents)
.DOC/.DOCX (text documents)
To be able to play even more video formats, and view even more image formats (e.g. PNG and BMP) you'll want to get an app such as DeoVR. You'll find it, as well as other video players you may now need for your Quest 2, in the following article: Best video player apps for Quest 2.
Note that yes, although those are video player apps, they can also be used for viewing images, and many formats the default Quest 2 Files app can't.
Extra step for Mac users before you start: Download and install the Android File Transfer app
Mac users have an extra step to go through, and that's downloading and installing an app called Android File Transfer.
For context, the Quest 2's operating system is based on Android, which is why you need said program in order to transfer files between it and your Mac computer or laptop.
So, download the app from the link above, and install it on your Mac device.
Now, after you connect your Quest 2 to your Mac via a USB Type-C cable, simply launch Android File Transfer to access the Quest 2 from your Mac, and transfer files to it. The process from here onwards is the same as described in Step 3 and Step 4 above.
Simply open Android FIle Transfer > Internal Shared Storage, and you'll see a number of Quest 2 folders you can access and transfer files to. Those include Music, Movies, and Pictures, among others. Drag and drop any files from your Mac into those folders, and they'll begin transferring to your Quest 2.
When the transfer is complete, check Step 4 above on how to view your files on your Quest 2.
My Quest 2 doesn't show up on my computer, what should I do?
This is a common issue that I personally also deal with all the time. A simple solution that always works is to reset your Quest 2.
First, disconnect the Quest 2 from your PC. Then simply put on the headset, press and hold its power key until you see a prompt with an option to restart it, and click that.
After the Quest 2 reboots, try connecting it to your PC again, and remember to "Allow" the connection, when the prompt pops up on your Quest 2.
Did you enjoy reading this article?
There's more to explore with a FREE members account.
Rado, a tech enthusiast with a love for mobile devices, brings his passion for Android and iPadOS to PhoneArena. His tech journey began with MP3 players and has evolved to include tinkering with Android tablets and iPads, even running Linux and Windows 95 on them. Beyond tech, Rado is a published author, music producer, and PC game developer. His professional work on iPads, from producing songs to editing videos, showcases his belief in their capabilities. Rado looks forward to the future of mobile tech, particularly in augmented reality and multi-screen smartphones.
A discussion is a place, where people can voice their opinion, no matter if it
is positive, neutral or negative. However, when posting, one must stay true to the topic, and not just share some
random thoughts, which are not directly related to the matter.
Things that are NOT allowed:
Off-topic talk - you must stick to the subject of discussion
Offensive, hate speech - if you want to say something, say it politely
Spam/Advertisements - these posts are deleted
Multiple accounts - one person can have only one account
Impersonations and offensive nicknames - these accounts get banned
Moderation is done by humans. We try to be as objective as possible and moderate with zero bias. If you think a
post should be moderated - please, report it.
Have a question about the rules or why you have been moderated/limited/banned? Please,
contact us.


Things that are NOT allowed: